Bob Beeman, a member of our Regatta Service and Oar Manufacturing team, demonstrates how to install a collar on an oar.
See page 6 of the Oar Manual for Collar Installation and Positioning
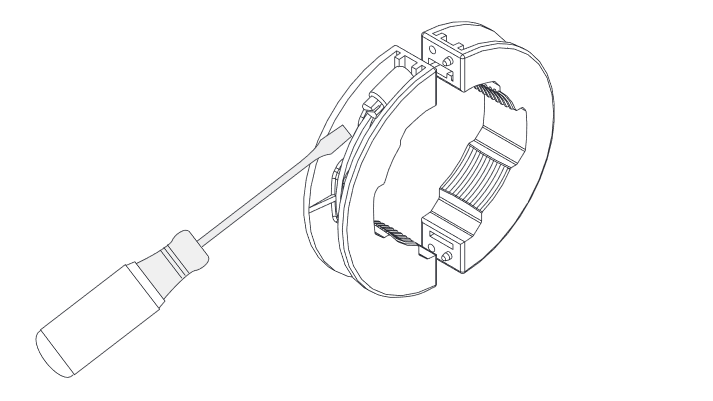
Each oar has a collar that consists of two pieces, which are essentially mirror images of each other. Small pegs on the ends insure that the pieces can only be put together with the proper orientation. Either side of the collar can face the oarlock; in fact, when one side wears out, you can rotate the collars to use the other side! A large stainless band clamp goes around both pieces to secure the collar onto the sleeve. See drawing.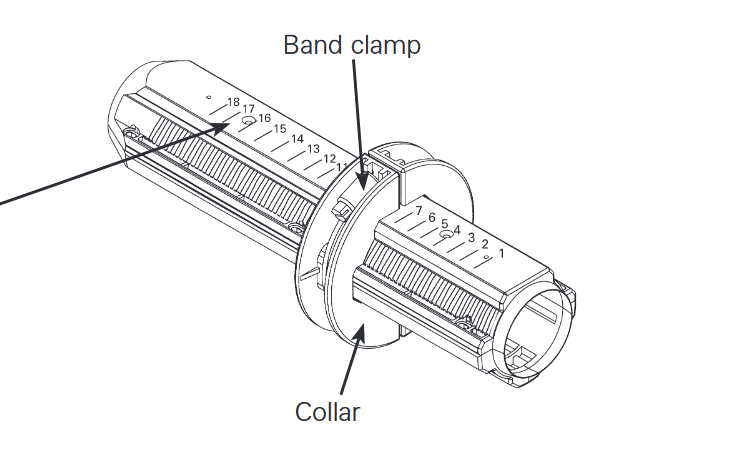
Step 1: Installing the Collars
Loosely assemble the collar pieces and band clamp around the sleeve.
Note the centimeter scale on the back of the sleeve as a reference for your collar position.
Step 2: Positioning the Collars
Be sure the teeth of the collar are engaged evenly in the sleeve grooves at the desired setting, then tighten the band clamp firmly with a screwdriver.
- Do not overtighten the collar band clamp.
- The band clamp should be tight enough to keep the collar teeth engaged in the sleeve grooves at the desired setting. Over-tightening may result in warping or damage of the collar.
- The band clamp does the work.
- A slight gap is desirable.